Cisco Press
This chapter covers the following topics:
Configuring route filters in Cisco CallManager Administration to reduce the number of route patterns or restrict calling to undesirable locations
Modifying route patterns to use access codes and discard digit instructions to convert the dialed number to a number that is supported by a national numbering plan
Configuring transformation masks to manipulate the appearance of the number of the calling party for outgoing calls and to manipulate called numbers for PSTN compatibility
Configuring translation patterns that manipulate dialed digits before routing a call to enable users to include a uniform dialing plan between offices or to enable hot line functionality
Describing how to access route plan reports to view a listing of all the Call Park numbers, Call Pickup numbers, conference numbers (such as Meet-Me numbers), route patterns, and translation patterns in the system
Users of any phone system often need to reach a variety of destinations that include calls to extensions located within the same site, to a different site within the same company (sometimes with different dialing plans), and to other companies located within the same country or a different country. Because these calls can take different paths, such as the IP WAN or a preferred public switched telephone network (PSTN) carrier, completing these calls often requires dialing various access codes, numbers of digits, or prefixes. At the same time, it is often prudent to restrict certain destinations for all users, such as 900 numbers.
To require users to understand the specific dialing patterns necessary to reach these various destinations is impractical and inconvenient. Digit manipulation, or the ability of Cisco CallManager to add or subtract digits to comply with a specific internal dial plan or national numbering plan, is the key to providing transparent dialing and creating a unified dialing plan. Implementing route filters in Cisco CallManager Administration blocks access to specified area codes.
This chapter covers route filters, discard digits instructions (DDIs), transformation and translation patterns, and the route plan report to view all route patterns in a Cisco IP telephony clustered solution.
Route Filters
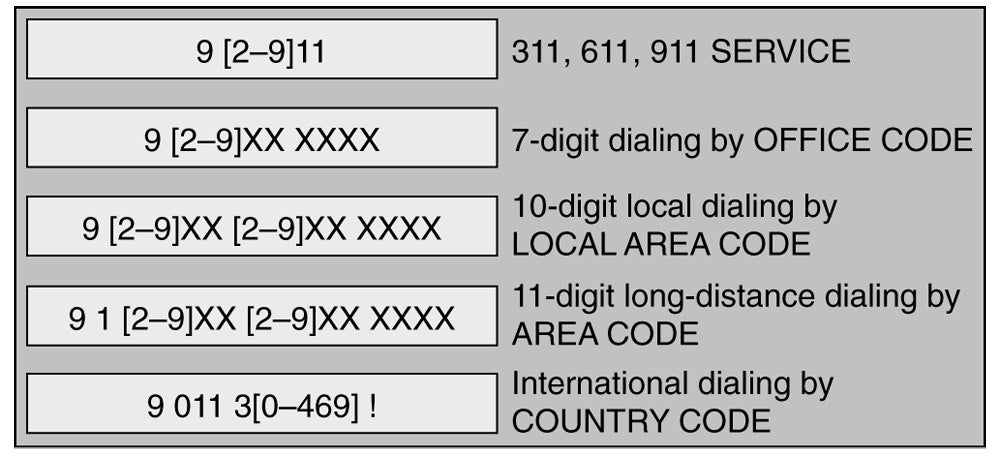
When creating route patterns, you can use the “@” wildcard to represent all the routes defined in the North American Numbering Plan (NANP). Although this is a simple way to provide PSTN access to your internal users, you might be providing far more access than you intend. As shown in Figure 11-1, the NANP includes high-expense patterns such as international dialing access, service numbers (such as 411), and 900 numbers. You can assign route filters to route patterns with the @ route pattern to help reduce the danger that full access to the NANP provides. You can accomplish this reduction by filtering what is included in the @ (or 9.@) route pattern.
@ Route Pattern Without Route Filters
When using the 9.@ route pattern, Cisco CallManager recognizes that dialing is complete when the user dials 1 + 10 digits (signifying long-distance dialing) or just dials 10 digits (local area codes without the 1). If the number dialed does not begin with a 1, Cisco CallManager considers it a local area code and assumes that dialing is complete after 10 digits.
In an area where seven digits are dialed for local numbers, Cisco CallManager cannot recognize which office exchange codes (NXXs) to use for routing unless you specifically code them as route patterns.
Note – NXX is the central office (CO) exchange code, which consists of three digits that designate a particular CO or a block of 10,000 subscriber lines. N is any digit between 2 and 9, and X is any digit between 0 and 9.
Generally, telephone company service providers arrange many NXXs in a given area code contiguously where you can use route pattern wildcards to assist in your configuration. Coding these individual route patterns for NXXs can be extremely difficult. You can use a route filter to simplify this procedure.
A route filter called seven-digit dialing is always preconfigured in Cisco CallManager. You should assign this route filter to any 9.@ route pattern in an area that uses seven-digit dialing. This route filter removes all local area codes. If a dialed number does not begin with a 1, then it is a seven-digit number, and Cisco CallManager considers dialing complete after seven digits. This situation requires you to configure local area codes specifically as separate route patterns. Doing so is generally not an issue because the number of area codes in a geographical region is usually small.
Note – Route filters are only used with the @ route pattern and are not necessary if you have configured a robust dial plan (that does not use the @ route pattern).
Route Filter Tags
You can design and configure route filters using a number of predefined tags in the Cisco CallManager CCMAdmin web utility. Table 11-1 provides a list of tags available to you when implementing route filters.
Table 11-1: Cisco CallManager Route Filter Tags
| Tag Name | Example Pattern | Description |
|---|---|---|
| AREA-CODE | 1 214 555 1212 | The area code in an 11-digit long-distance call |
| COUNTRY-CODE | 011 33 123456# | The country code in an international call |
| END-OF-DIALING | 011 33 123456# | The #, which terminates interdigit timeout for an international call |
| INTERNATIONAL-ACCESS | 01 1 33 123456# | The initial 01 of an international call |
| INTERNATIONAL-DIRECT-DIAL | 01 1 33 123456# | The digit that denotes the direct-dial component of an international call |
| INTERNATIONAL OPERATOR | 01 0 | The digit that denotes the operator component of an international call |
| LOCAL-AREA-CODE | 214 555 1212 | The area code in a 10-digit local call |
| LOCAL-DIRECT-DIAL | 1 555 1212 | The initial 1 that is required for some 7-digit calls |
| LOCAL-OPERATOR | 0 555 1212 | The initial 0 that is required for operator-assisted local calls |
| LONG-DISTANCE-DIRECT-DIAL | 1 214 555 1212 | The initial 1 that is required for long-distance direct-dialed calls |
| LONG-DISTANCE-OPERATOR | 0 214 555 1212 | The initial 0 that is required for operator-assisted long-distance calls |
| NATIONAL-NUMBER | 011 33 123456# | The national number component of an international call |
| OFFICE-CODE | 1 214 555 1212 | The office exchange code of a North American call |
| SATELLITE-SERVICE | 011 88141234# | A specific value that is associated with calls to the satellite country code |
| SERVICE | 1 411 | A value that provides access to local telephony provider services |
| SUBSCRIBER | 1 214 555 1212 | A particular extension that is served by a given exchange |
| TRANSIT-NETWORK | 101 0321 1 214 555 1212 | A long-distance carrier code |
| TRANSIT-NETWORK-ESCAPE | 101 0321 1 214 555 1212 | The escape sequence that is used for entering a long-distance carrier code |
Configuring Route Filters
Route filter configuration occurs in two major steps:
Configure route filter with necessary tags and arguments.
Apply the route filter to a route pattern or translation pattern.
Just as with access lists on routers, you can create route filters all day and they will never make any difference until you have applied them. Just like an access list, the sole purpose of a route filter is to match criteria; how you apply the route filter determines if the criteria is permitted or denied.
To configure a route filter, use the Cisco CallManager Administration window:
Choose the Route Plan menu.
Choose Route Filter from the menu bar.
Click the Add a New Route Filter hyperlink.
Choose North American Numbering Plan from the Dial Plan menu.
Enter a name in the Route Filter Name field. The name can consist of up to 50 alphanumeric characters, and can contain any combination of spaces, periods (.), hyphens (-), and underscore characters (_). Each route filter name must be unique to the route plan.
After you have accomplished these initial steps, the Route Filter Clause Configuration window appears, as shown in Figure 11-2.
Route Filter Clause Configuration Window
From this point, you can combine your tags with operators to define match conditions. Table 11-2 describes the four operators available when configuring route filters.
Table 11-2: Cisco CallManager Route Filter Operators
| Operator | Description |
|---|---|
| NOT-SELECTED | Do not filter calls based on the dialed digit string associated with this tag. |
| EXISTS | Filter calls when the dialed digit string associated with this tag is found. |
| DOES-NOT-EXIST | Filter calls when the dialed digit string associated with this tag is not found. |
| == | Filter calls when the dialed digit string associated with this tag matches the specified value. |
The following are examples of match conditions using route filter tags and operators:
A route filter that uses the tag AREA-CODE and the operator DOES-NOT-EXIST selects all dialed digit strings that do not include an area code.
A route filter that uses the tag AREA-CODE, the operator = =, and the entry 515 selects all dialed digit strings that include the 515 area code.
A route filter that uses the tag AREA-CODE, the operator = =, and the entry 5[2-9]X selects all dialed digit strings that include area codes in the range of 520 through 599.
A route filter that uses the tag TRANSIT-NETWORK, the operator ==, and the entry 0288, along with the tag TRANSIT-NETWORK-ESCAPE, the operator ==, and the entry 101, selects all dialed digit strings with the carrier access code 1010288.
Applying Route Filters
After you have configured the route filter, you must apply them to a route pattern or translation pattern to define the permit or deny action.
Note – Translation patterns are discussed later in this chapter.
To apply the route filter you have created to a route pattern, perform the following steps:
Choose the Route Plan > Route/Hunt > Route Pattern menu selection.
Choose the Add a New Route Pattern hyperlink.
Define the route pattern as @ (or 9.@) to represent the NANP.
Choose your configured route filter from the Route Filter drop-down list, as shown in Figure 11-3.
Applying a Route Filter to a Route Pattern
Choose a PSTN exit gateway or route list.
Select the Route This Pattern radio button to allow the numbers matching the filter to route to the PSTN or select the Block This Pattern radio button to block the numbers matching the filter from reaching the PSTN.
Practical Route Filter Example
To demonstrate route filter configuration, imagine that a company wanted to create a route filter that kept 1-900 numbers from being made available in the CallManager route plan. The first step would be to create a route filter that matched the area code 900, as shown in Figure 11-4.
Route Filter Matching the 900 Area Code
After the route filter has been added to the configuration, you then need to apply it to a route pattern to define the action required. Figure 11-5 illustrates the creation of a 9.@ route pattern (representing the NANP) with the Match 900 Numbers route filter applied. The key action rests in the Route This Pattern or Block This Pattern radio buttons. If you select to Route This Pattern, you would add only 900 numbers to the Cisco CallManager route plan. Unless you had a very strange organization, this is not a desired effect. Rather, you would select the Block This Pattern radio button to block any numbers containing the 900 area code.
CallManager allows you to configure multiple 9.@ route patterns, provided each has a unique route filter configuration. This provides flexibility when creating your route plan. By combining multiple 9.@ route patterns with unique route filters, you can route (or block) exactly what you want from the CallManager route plan.
Tip – You could also accomplish this same objective by creating a route pattern of 1900XXXXXXX and choosing Block this Pattern under the route pattern configuration.

Route Pattern Configuration
Discard Digit Instructions
Discard Digit Instructions (DDIs) allow conversions of a dialed number specific to a national numbering plan. Typically, companies use a route pattern such as 9.@ to access the PSTN. However, only the internal IP telephony network uses the 9 access code to reach the PSTN. If the Cisco CallManager were to keep the access code prefixed to the number to forward to the PSTN, the call would not complete. To avoid this, you can use DDIs to strip extra digits before the call reaches the PSTN.
In general, administrators apply DDIs to route patterns that contain the @ wildcard; however, you can use the DDI PreDot with route patterns that use the “.” wildcard even if the route patterns do not contain the @ wildcard. Cisco CallManager applies DDIs to the called-party transformation masks at the route pattern, the route details of a route list, or a translation pattern. DDI identifiers, shown in Figure 11-6, are additive. The DDI PreDot 10-10-Dialing combines the effects of each individual identifier. Table 11-3 depicts the most commonly used DDIs in the Cisco CallManager route plan.
Table 11-3: Cisco CallManager Digit Discard Instructions
| Digit Discard Instructions | If the route pattern is 9.5@… Discarded Digits | Used For |
|---|---|---|
| PreDot | 95 1 602 555 1212 | Access codes |
| PreAt | 95 1 602 555 1212 | Access codes |
| 11D/10D@7D | 95 1 602 555 1212 | Toll bypass |
| 11D@10D | 95 1 602 555 1212 | Toll bypass |
| IntlTollBypass | 95 011 33 1234 # | Toll bypass |
| 10-10-Dialing | 95 1010321 1 602 555 1212 | Suppressing carrier selection |
| Trailing-# | 95 1010321 011 33 1234 # | PSTN compatibility |
You can configure DDIs at multiple places in the CallManager route plan. One of the more common places is at the route pattern configuration. As shown in Figure 11-6, you can find the DDIs under the Called Party Transformations near the end of the Route Pattern Configuration window.
Tip – Digit Discard Instructions applied at the route pattern level are visible to the end user. For example, if the caller dials 914085551212 and the DDI removes the 9, the user will see the number change to 14085551212 on the LCD display of their IP Phone. DDIs applied at the route group level (from within the route list) are not visible to the end user. Applying DDIs at the route group level is covered later in this chapter.

Digit Discard Instructions
As you can see, CallManager offers a variety of combinations of all the DDIs listed in Table 11-3.
Transformation Masks
Dialing transformations allow the call-routing component to modify either the calling number or the dialed digits of a call. Transformations that modify the calling number are calling-party transformations; transformations that modify the dialed digits are called-party transformations.
Calling-party transformation settings allow you to manipulate the appearance of the calling-party number for outgoing calls. A common application of a calling-party transformation is to use the company external phone number of a calling station in place of the directory number (DN) for outgoing calls. The calling-party number is used for Calling Line Identification (CLID). During an outgoing call, the CLID is passed to each PBX, CO, and interexchange carrier (IXC) as the call progresses. The CLID is also delivered to the calling party when the call is completed.
Note – Caller ID is also referred to as Automatic Number Identification (ANI) .
Called-party transformation settings allow you to manipulate the dialed digits, or called-party number, for outgoing calls. Examples of manipulating called numbers include appending or removing prefix digits (outgoing calls), appending area codes to calls that are dialed as seven-digit numbers, appending area codes and office codes to interoffice calls that are dialed as four- or five-digit extensions, and suppressing carrier access codes for outgoing calls.
When configuring calling- or called-party transformations, a transformation mask operation allows the suppression of leading digits, the change of some digits while leaving others unmodified, and the insertion of leading digits. A transformation mask requires two pieces of information: the number that you want to mask and the mask itself.
In the transformation mask operation, Cisco CallManager aligns the number with the mask so that the last character of the mask aligns with the last digit of the number. Cisco CallManager uses the corresponding digit of the number wherever the mask contains an X. If the number is longer than the mask, the mask removes the leading digits. Figure 11-7 demonstrates the transformation mask logic.
Transformation Mask Logic
As you can see from Figure 11-7, the initial number (which could be dialed or caller ID information, depending on the type of transformation mask you choose) passes through the first transformation mask. By right-justifying the digits, CallManager passes the number 35453 through the first transformation mask. The digits match to the right-justified X wildcards, causing it to pass through. CallManager prepends the additional digits to the left of the wildcards. As it passes through the second transformation mask, the numbers are again right-justified. This time, only the “35” digits pass through the X wildcards; CallManager replaces the rest of the string with the hard-coded digits to the left and right of the X wildcards.
Calling-Party Transformations
The example in Figure 11-8 shows the applicable settings for calling-party transformations and the order in which Cisco CallManager processes those instructions.
Calling-Party Transformations
You can configure three types of calling-party transformations in the call-routing component and on route lists:
Use the external phone number mask, which instructs the call-routing component to use the external phone number of a calling station rather than its DN or the caller ID information. Without the external phone number mask, the calling number might appear as an extension number to the PSTN rather than a fully routable PSTN phone number. You can apply the external phone number mask on a line-by-line basis through the DN configuration screen on the device.
The calling-party transformation mask allows the suppression of leading digits, leaves other digits unmodified, and inserts leading digits. As shown in Figure 11-8, the post-external phone number mask caller ID information is 2147135062. This passes through the calling-party transformation mask of 40885XX0000, which allows only the numbers “35” to pass through the XX wildcards. The resulting caller ID information is 4088535000.
Prefix digits allow the prepending of specified digits to the calling number.
Cisco CallManager applies the transformations in the order that is presented in the example.
Tip – Remember, the calling-party transformations transform caller ID information (the number of the person who is calling).
Called-Party Transformations
The example in Figure 11-9 shows the applicable settings for called-party transformations and the order in which Cisco CallManager processes those instructions.

Called-Party Transformations
You can configure the following three types of called-party transformations in the call-routing component and on route lists:
DDIs allow the discarding of digits in the dialed number. Such instructions are critical for implementing toll-bypass solutions. This need arises when Cisco CallManager must convert the long-distance number that the calling party has dialed into a local number. This number allows Cisco CallManager to pass the digits to the PSTN. You can also use DDIs to discard PSTN access codes, such as 9. Figure 11-9 demonstrates the removal of the 10-10-Dialing portions of the call to eliminate other long-distance carriers a user might choose to use.
The called-party transformation allows the suppression of leading digits, changes the existing digits while leaving others unmodified, and inserts leading digits. Figure 11-9 illustrates the use of a called-party transformation mask consisting of ten “X” wildcards. This has the effect of stripping any preceding digit beyond the ten wildcards (in this case, CallManager strips the 9 and the 1). This might be necessary when configuring toll-bypass on the CallManager. For example, you might have a location that can access the 808 area code without incurring toll charges. You can configure the Cisco CallManager to route the call across the IP WAN then out a LEC.
Prefix digits allow the prepending of one or more digits to the called number. Figure 11-9 illustrates prefixing an 8 to the front of the original dialed number. This might be required by a PBX at a remote site. For example, the call is transformed using the called-party transformation mask, then prefixed with an 8 and routed across the IP WAN. When the PBX at the remote site received the string, it recognizes the 8 as an outside access code and routes the call to the PSTN LEC.
Cisco CallManager applies the transformation in the order that is presented in the example.
Note – You could accomplish the same result shown in Figure 11-9 by simply applying a called-party transformation mask of 8XXXXXXXXXX. This is a more efficient method; the called-party transformations shown are used to illustrate the various transformations and the order in which the CallManager applies them.
Tip – Remember, the called-party transformations transform dialed-number information (the number that a user called).
Configuring Calling- and Called-Party Transformation Masks
You can apply calling- and called-party transformations at the route pattern, route list, or translation pattern configuration windows. The calling-party transformation setting that is used in route lists applies to the individual route groups that make up the list rather than to the entire route list. The calling-party transformation settings that are assigned to the route groups in a route list override any calling-party transformation settings that are assigned to a route pattern that is associated with that route list.
Because you can be more specific, network administrators usually apply transformation masks at the route list level. In this way, you can assign a different transformation mask for each route group in the route list. Transformation masks configured at the route list level have priority over those configured at the route pattern level because they are processed last. If you have configured a transformation at the route pattern level, it becomes more of a “global” translation, that is, as soon as the pattern is matched, the transformation takes effect. As the route pattern sends the call to the route list and the prioritized route group is chosen, the transformations relating to that specific route group apply second, transforming the already transformed number from the route pattern into whatever you have defined.
For example, in the network illustrated in Figure 11-10, a network administrator has two route groups created: the PSTN route group and the IP WAN route group. Both of these route groups contain multiple gateways that connect to their respective networks. When Cisco CallManager forwards a call to a gateway in the PSTN route group, the network administrator applies a mask that transforms the number into an E.164-compliant phone number. However, when Cisco CallManager uses a gateway from the IP WAN route group, Cisco CallManager leaves the number as a four-digit extension.
Transformation Network Design
Transformation Example
Figure 11-11 summarizes how transformations to the called-party (dialed digits) and to the calling-party numbers are made within Cisco CallManager. In Figure 11-11, a user dials a number to which Cisco CallManager first applies a calling-party transformation (“calling party” refers to the person who originated the call). This action changes the caller ID number that is displayed on the destination phone. Cisco CallManager then applies a called-party transformation to change the number that is dialed.
Called-Party Transformations
The two transformations are explained in the figure and, for user A specifically, in the following steps:
User A has a DN of 5062. This user dials DN 91234.
The dialed number matches the route pattern 9.1xxx.
The DDIs contain instructions to discard the 9. The dialed number is now 1234.
The calling number 5062 now passes through the calling-number transformation mask, which contains instructions to change the last three digits of the calling party number to 000. The new calling number is 5000.
Cisco CallManager then passes the called number 1234 through the called-number transformation mask X000, which changes the dialed number to 1000.
The result is a calling-party number of 5000 and a called-party number of 1000.
Translation Patterns
Cisco CallManager uses translation patterns to manipulate dialed digits before routing a call. In some cases, the dialed number is not the number that is used by the system. In other cases, the dialed number is not a number that is recognized by the PSTN.
Digit manipulation and translation patterns are used frequently in cross-geographical distributed systems where, for instance, the office codes are not the same at all locations. In these situations, a uniform dialing plan can be created, and translation patterns can be applied to accommodate the unique office codes at each location. The following are additional examples when you can use translation patterns:
Routing emergency calls to security desks and operator desks (such as sending emergency numbers to a local security office or routing ‘0’ to the local operator extension)
Hot lines with a need for private line, automatic ringdown (PLAR) functionality
Extension mapping from the public to a private network
Translation patterns use the results of called-party transformations as a set of digits for a new analysis attempt. The second analysis attempt might match a translation pattern. In this case, Cisco CallManager applies the calling- and called-party transformations of the matching translation pattern and uses the results as the input for another analysis attempt. For example, you have a called-party transformation set up under a route pattern that transforms the dialed number 5555 to 0. You could then have a translation pattern defined to match the dialed number 0 and transform it to an operator extension or hunt group number. To prevent routing loops, Cisco CallManager breaks chains of translation patterns after ten iterations.
Translation Pattern Configuration
Configuration of a translation pattern is similar to configuration of a route pattern. Each pattern has calling- and called-party transformations and wildcard notation. The difference is that when Cisco CallManager applies the translation pattern, it starts the digit-analysis process over and routes the call through a new path if necessary.
To configure a translation pattern, choose the Route Plan menu and choose Translation Pattern. After you click the Add a New Translation Pattern hyperlink, the Translation Pattern Configuration window appears, as shown in Figure 11-12. You can define the route pattern to match (in the Translation Pattern field) and the calling- or called-party transformation settings that you want to apply.
Tip – Many new Cisco CallManager administrators get the translation and transformation terms confused. Cisco CallManager allows you to create translation patterns that contain both calling- and called-party transformation masks to modify the caller ID or dialed-number information. Translation patterns are usually used to transform dialed digits, so the called-party transformation masks are more frequently used.
Translation Pattern Configuration Window
Practical Use of a Translation Pattern
Figure 11-13 shows an application for translation patterns. When the Direct Inward Dial (DID) range from the CO does not match the internal DN range, you can use a translation pattern to make the connection.
Practical Translation Pattern Example
In Figure 11-13, a company has a PSTN DID range of 408-555-1xxx. However, all of the internal four-digit extensions begin with 4xxx. When the company receives an incoming call, the company could use DDIs to remove the 555 from the beginning of the number. However, the 1xxx extension still remains. Instead, the translation pattern could apply a 4XXX called-party transformation mask. This mask would convert the 1xxx external DID range to a 4xxx internal range. After Cisco CallManager applies the transformation mask, it reanalyzes the dialed number and directs it to the correct internal extension. So, to summarize (and simplify), the following configuration would be created:
Translation Pattern: 4085551XXX
Called-Party Transformation Mask: 4XXX
Resulting Phone Number: 4XXX
If a call came into the DID 4085551111, CallManager would convert the dialed digits to 4111.
Route Plan Report
The route plan report is a listing of all the Call Park numbers, Call Pickup numbers, conference numbers (such as Meet-Me numbers), route patterns, and translation patterns in the system. The route plan report allows you to view either a partial or full list and go directly to the associated configuration windows. You can accomplish this by selecting a route pattern, partition, route group, route list, Call Park number, Call Pickup number, conference number, or gateway.
The route plan report allows you to save report data into a comma-separated values (CSV) file that you can import into other applications (such as Microsoft Excel). The CSV file contains more detailed information than the web pages, including DNs for phones, route patterns, and translation patterns.
To generate a route plan report, use the Route Plan > Route Plan Report selection. The Route Plan Report window shown in Figure 11-14 appears. From here, you can either generate a route plan report to view in the web interface or click the View in File hyperlink to download the route plan as a CSV file.
Generating a Route Plan Report
Summary
This chapter covered the design and configuration of an advanced Cisco CallManager route plan. The concepts started by using the route filter configurations to screen the 9.@ NANP route pattern. By default, the @ wildcard includes numbers that might be undesirable for a corporate entity. By using route filters, you can limit the number of patterns that are added when creating a PSTN dial-plan using the @ wildcard.
You can also use discard digit instructions (DDIs) to manipulate the digits sent to a destination, especially the PSTN. Most corporations have a number that is dialed (such as 9) to indicate an outside PSTN call. You can use DDIs to strip this access code before the call leaves to the PSTN. You can use DDIs in a number of circumstances to properly transform incoming or outgoing calls, many of which are seen in Chapters 12-14.
You can use calling- and called-party transformations to change caller ID information (calling) or dialed digits (called). These masks give you complete flexibility to transform this information however you see fit. Because you can apply them at nearly every level of the CallManager route plan, you can make differing modifications to dialed-number information depending on the gateway the CallManager decides to use to route the call. Translation patterns can also be added to the route plan for last resort modifications using calling- or called-party transformations.
Review Questions
You can find the solutions to these questions in Appendix A, “Answers to Review Questions.”
What does Cisco CallManager do when dialed digits pass through a translation pattern?
extends the call to the destination
forwards the call to a route pattern
selects the closest match to that pattern
sends the transformed digits through digit analysis one more time
When DN 1111 calls and a calling transformation mask of 972555XXXX is applied, which CLID is sent?
1111
5551111
9725551111
19725551111
What are the final digits that Cisco CallManager sends when the discard digits instruction PreDot is applied to the 9808.5550150 pattern?
98085550150
5550150
95550150
8085550150
You have created a route filter called “Match 900 numbers” where you have defined a condition, “AREA-CODE == 900”. What must you do to put this route filter into effect?
You need to apply the route filter to a route pattern and select the allow or deny action.
You need to apply the route filter to a route list and select the allow or deny action.
You need to create a transformation pattern.
Nothing needs to be done; the route filter takes effect as soon as it is inserted into the configuration.
You apply the DDI 11D@10D to the route pattern 16025551212. What digit(s) are discarded?
1
1602
1602555
555
You are editing the properties for the 9.@ route pattern. You apply a calling-party transformation mask of 8. What does this accomplish?
The dialed digits are prefixed with an 8.
The caller ID information is prefixed with an 8.
The dialed digits are transformed into an 8.
The caller ID information is transformed into an 8.
What information does a called-party transformation mask modify?
the long-distance code information
the dialed-digit information
the caller ID information
It depends where the mask is applied.
You apply a prefix digit of 99 and a calling-party transformation mask of 555XXXX under a PSTN route pattern. A user at extension 5123 dials a PSTN number; what information is displayed for the caller ID information on the external phone?
555
99555
5555123
995555123
5559912
You have created a route pattern of 4xxx to reach extensions in another CallManager cluster. To properly forward the number, you have added a prefix-digit transformation of 8. In addition, you created a translation pattern of 8.xxxx that applies a PreDot DDI. What dialed-number information does the Cisco CallManager forward?
The dialed digits will forward to the other side as 4xxx.
The dialed digits will forward to the other side as 84xxx.
The dialed digits will forward to the other side as xxx.
The CallManager will play a fast busy signal.
Which transformation changes caller ID information?
translation patterns
calling-party transformations
called-party transformations
route patterns
Copyright © 2007 Pearson Education. All rights reserved.